|
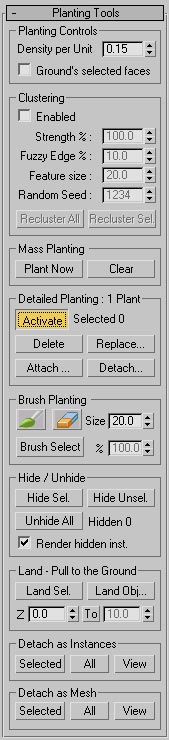
This panel provides options and controls on actual planting. Setup Transformations and Setup Collisions / Layers panels are used to prepare plants for planting while this panel is where 'magic' happens (just planting that is).
Planting process can be roughly split into 2 modes. The first one is Mass Planting where based on current settings millions of objects will be planted by a single button click. The second mode is Detailed Planting and it, as the name suggests, allows more precise positioning of planted objects. You can switch back and forth between those two modes of planting for the best results.
Planting Controls - This group of options affects both planting modes: Mass Planting and also Detailed Planting mode.
Density per Unit - Determines how densely planted objects will get placed. The bigger the value, the denser the placement will be. Planter uses the following formula to calculate maximum number of objects that will attempt to place on the terrain surface:
'Density per Unit' * 'Density per Unit' * 'Terrain surface area' + 1.
The final number will be rounded down to the closest integer value but because of approximation, errors might appear to be sometimes 1 more or 1 less than expected. Planting process will also respect enabled constraints (collision avoidance and layer planting), so the final number of planted objects could end up being much less.
Ground's selected faces - When this option is checked, you can select specific faces of terrain (ground objects) where objects will get placed. This option is used to further limit planting to smaller areas: all other limits (GroundWiz layer limits and collision options) will also be respected.
Clustering (new since version 1.600) - In nature, different types of plants tend to grow in groups. For example, on meadows same type of flowers will grow closer together, and in forest same type of trees are more likely to be growing in the same area.
Clustering was introduced to Planter to help simulate grouping effect so common in nature. Just like other planting related parameters, clustering feature can be used in Mass Planting and Brush Planting mode.
Tip: Depending on the size of plants and ground where plants will be placed, adjust clustering parameters to get the maximum effect of clustering feature. For example, smaller cluster size may be more suitable for plants like grass while bigger cluster size may fit big trees.
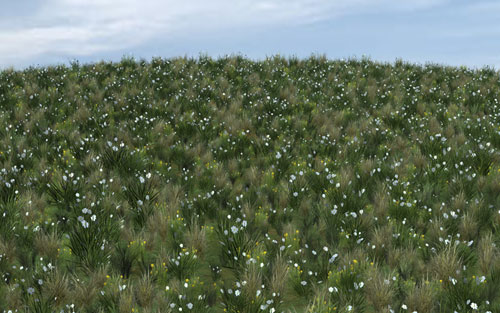
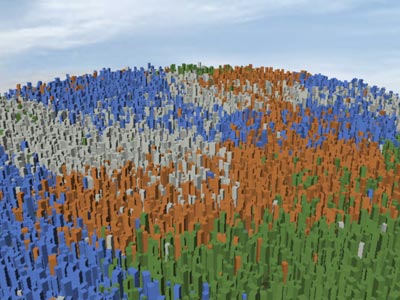
Without clustering, 4 different plants are randomly mixed and placed together.
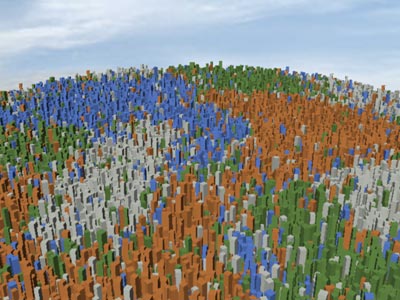
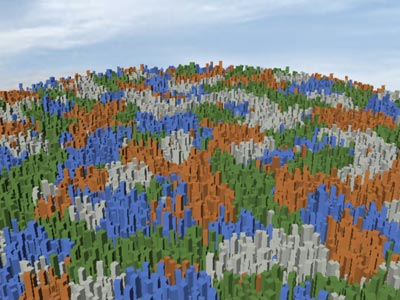
With clustering, each of 4 different plants is placed in clusters.
Enabled - When enabled, cluster planting is active.
Strength % - This decides how pronounced clusters will be. 0% means that each plant is completely randomly placed while 100% creates visible clusters. To get clearly defined clusters, it might be useful to use strength of well over 100% (this value can go up to 10000%).
Clustering with smaller strength
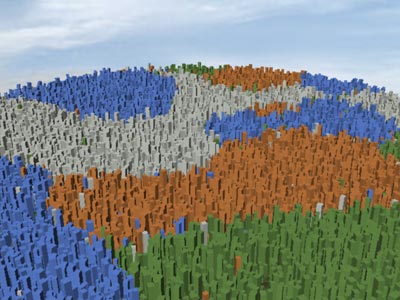
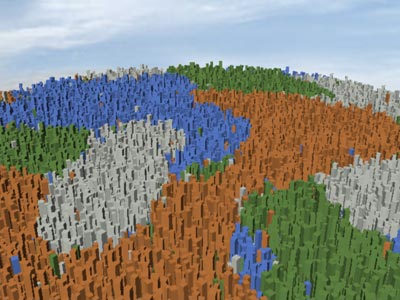
Clustering with bigger strength
Fuzzy Edge % - Using this parameter, you can make borders where clusters of plants meet either very sharp or fuzzy: 0% sharp edge, 10% a bit fuzzy, 100% very fuzzy.
Clustering with smaller fuzziness
Clustering with bigger fuzziness
Feature Size - Controls an average cluster size. It is important to note that cluster size of each plant is also affected by Plant's Presence parameter; together they determine the final size of each cluster.
Clustering with smaller size
Clustering with bigger size
Random Seed - Controls cluster's random placement. Same seed will produce clusters in the same position.
Recluster All - A bit of a shortcut feature that allows already placed instances to be assigned to new plants with current cluster parameters. Positions of all planted instances will be kept intact.
Recluster Selected - Similar to 'Recluster All' except that reclustering will be done only on selected instances, accessible in Detailed Planting mode.


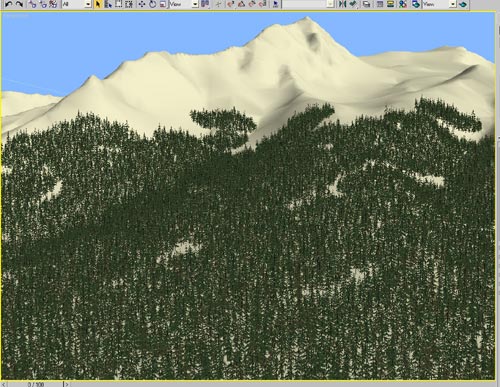
Mass Planting - Makes it possible to plant huge number of objects automatically. For a big area, Mass Planting is a fast way of planting and is usually the first step in planting process. Once objects are approximately planted, you should explore Detailed Planting tools.
Always remember that planting will only consider plants that are active.
Plant Now - Starts the planting process. Before using this option, all the planting options (plants, transformations, collisions) should have already been set up. Once the button is clicked, 'Planting in Process' window will pop up that shows how the planting process is progressing. It will display how many positions have been tested and how many objects have been planted - you can cancel the planting at any time by pressing 'Escape' key. Planting speed is greatly affected by certain options like GroundWiz Layer limits, Collision settings and of course the size of the planted area so it might take quite some time to finish.
Note: Once planting is finished and if you adjust some parameters, all planed objects will be updated each time you press 'Plant Now' button, yet many objects might keep the same random feel. For different placement (different randomness) with the same parameters, press 'Clear' button first and then 'Plant Now'. Repeat this process until you get the placement you desire.
Clear - Clears all planted objects for all plants that are active. This process will also be affected by Ground's selected faces option.
Using Ground's selected faces, you can remove objects on a certain area. For example, if you select a few faces on the ground and press 'Clear', all the planted objects on those selected faces will be deleted.
Before clearing planted objects on certain ground's selected faces
After clearing planted objects on certain ground's selected faces
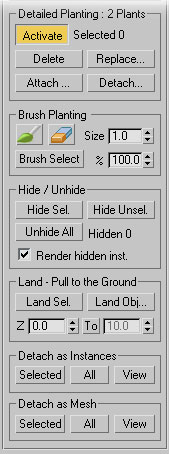
Detailed Planting - Once you are done with Mass Planting and you need to modify or edit plants in a specific area, this set of tools can be very handy.
In this mode individual planted objects can be moved, scaled, rotated just like normal 3ds Max objects. Then there is brushing tool that allows planting, deleting and selecting hundreds of objects at the same time with a single stroke of a brush. And finally, planted objects can be detached from the Planter and put directly into the max scene or even the other way around - max objects that are instances of Planter's objects can be put back into Planter.
Activate - This button activates Detailed Planting mode. Always remember that planting will only consider plants that are active. Once pressed, you can do sub-selection of planted objects just as if they were standard max objects with all the standard max operations: detach/move/delete/scale/rotate/clone.
Delete - Deletes selected planted objects.
Replace - With this option, you can replace currently selected planted objects with another plant. A new window will open that will show a list of available plants to be used as a replacement.
This option is quite useful if you want to add diversity to already planted objects.
Attach - Allows attaching of standard max objects and also other Planter objects to the current Planter. A new window will open that will display all valid max objects that can be attached to the Planter. Since version 1.500, this feature supports a wider range of objects that can be attached: other Planter objects, instances of objects that are already used as plants in the current Planter and also any other max objects - if max object is not yet used by the current Planter then a new Plant will be created.
When other Planters are attached to the current Planter then plant names are used to distinguish between different plants inside of the Planter. Plants with same names will be considered to be same and only one plant will be used and all object instances will be put under this plant.
Detach (new since version 1.500) - Allows you to detach selected instances as a new Planter object. It works in a similar way as Detach on Editable Poly, allows user to detach instances to a new Planter as clone (copy instances) or not.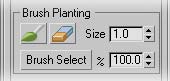
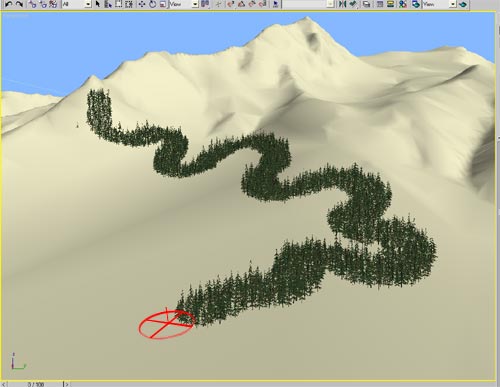
Brush Planting - In this planting mode, it is possible to plant objects with a brush: all planting settings will be respected just like when using Mass Planting. While Mass Planting is automatic and more appropriate for huge areas, Brush Planting was created to take care of smaller areas where precise planting is required.
Brush - When clicked, you can start planting objects with a brush. Plants will be placed wherever you pull the brush on the terrain as shown in the following picture. While left mouse button is used for planting, right mouse button can be used to erase recently planted objects. Adjust brush size with Size option.
Eraser - Use this brushing mode when you need to erase planted objects. In case objects are placed far above the ground due to 'Surface Offset Range', increase the Size of the brush to reach those objects if needed.
1. Before erasing planted objects with a brush
2. After erasing planted objects with a brush
Size - Set the brush size (in 3ds Max world units).
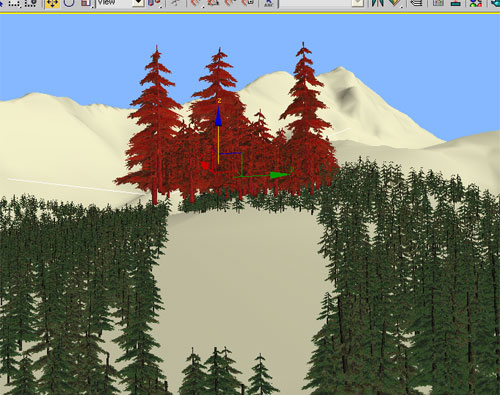
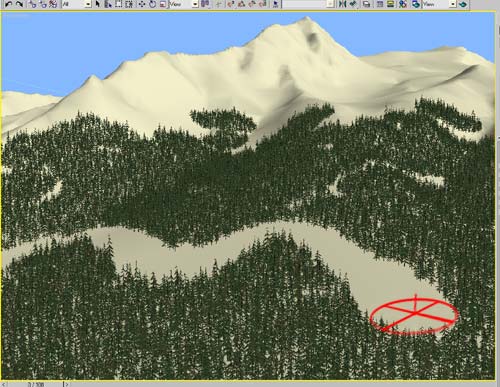
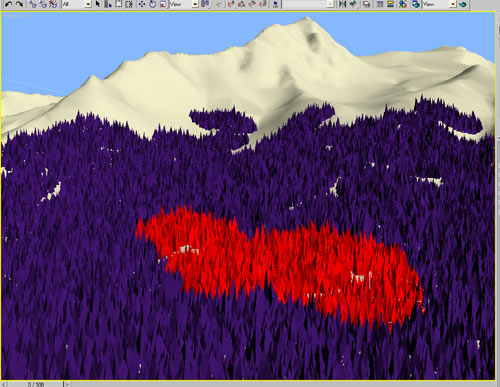
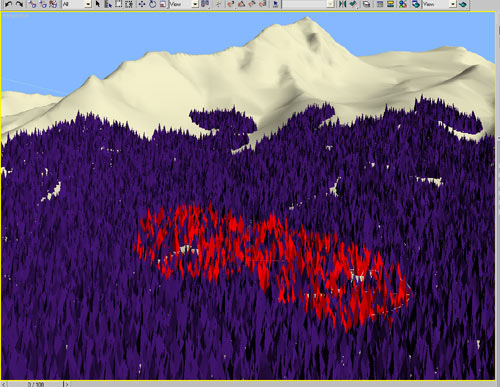
Brush Select - This brushing mode is used to select planted objects with a brush. Except for selecting all the planted objects under the brush, it is also possible to select only smaller number of objects under the brush. If percent parameter is set for example to 20%, only 20% or randomly picked objects under the brush will get selected. This can be quite useful in combination with other options like 'Replace', 'Scale', 'Delete'... to add diversity to planted areas.
1. Brush Select 100%
2. Brush Select 50%
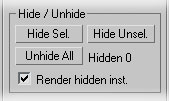
Hide / Unhide (new since version 1.500) - This option allows you to hide and unhide Planter object instances.
Hide Sel. - This option hides Planter object instances that are selected.
Hide Unsel. - This hides Planter object instances that are not selected.
Unhide All - It unhides all hidden object instances.
Render hidden inst. - With this option on (default) hidden instances will be rendered. When it's off, this option forces renderer to only see visible instances - useful when working on big complex scenes.
Land - Pull to the Ground (new since version 1.500) - This option makes it possible to land / pull the planted object instances to the ground. This is useful when you modify terrain ground object after planting objects, but you don't want to replant the objects.
Land Sel. - This option lands / pulls selected Planter object instances to the terrain ground object in the Z axis direction.
Land Obj - This lands / pulls any max objects that are selected from the list to the terrain ground object in the Z axis direction. Using this option, you can quickly pull selected objects to the terrain when objects may float or sink after modifying terrain.
Z - It sets offset value constant for all the selected objects in the Z axis direction when landing objects. The number is based on the current max unit. For instance, when it's set to -1, all the selected objects will be pulled to the ground below -1.
To - When it is enabled, it sets maximum random offset range in the Z axis direction while 'Z' parameter sets minimum random offset range. The number is based on the current max unit.
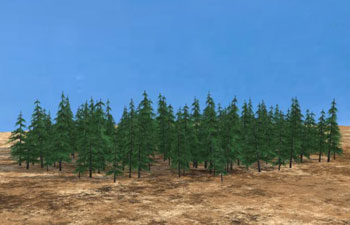
1. Before terrain is modified
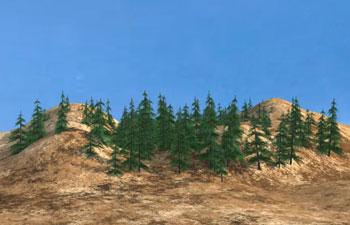
2. After terrain is modified
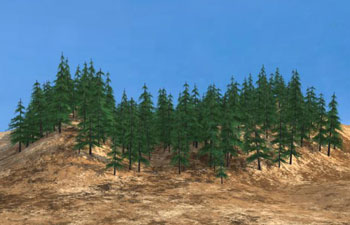
3. After landing/pulling trees to the terrain
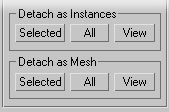
Detach Object Instances - This option makes it possible to detach planted object instances from the Planter and put them to the scene as standard max objects. Afterwards you can reattach those objects back to the Planter as long as you keep them as instances of original objects.
Selected - This option detaches instances of selected planted objects from the Planter.
All - Detaches all the planted objects from the Planter. Note that since 3ds Max is not made to handle more than 20,000 or so instances, this option is appropriate when the number of planted objects in the Planter is not too big (or program might crash).
View - This detaches all the planted objects shown in the current view from the Planter. In other words, it will detach only those objects you can see in the current view. If LODs are used, you will be asked if you'd like to place LODs or only the highest LOD object to max scene.
Detach Object as Mesh - This option works the same way as Detach Object Instances except that in this case all detached planted objects will be automatically merged into one big mesh object. Sometimes this might be useful since 3ds Max is not good at handling many small scene objects.
Selected - This option detaches selected planted objects from the Planter and creates a merged mesh.
All - Detaches all planted objects from the current Planter and creates a merged mesh. Make sure that there aren't too many objects in the current Planter or the program might crash because of lack of memory.
View - This detaches all the planted objects shown in the current view from the Planter and creates a merged mesh. If LODs are used, you will be asked if you'd like to use all LODs or only the highest LOD object when creating merged mesh.